This one’s a quick tip on how to reset a lost ESXi root password using the vCenter Host Profiles.
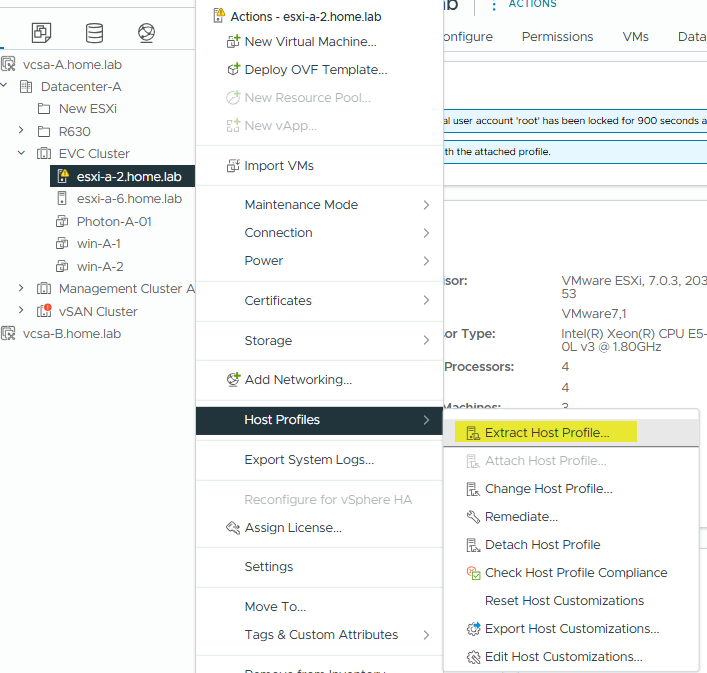
Step 1. Extract the Host Profile
Start by logging into vCenter and finding the host with the lost password. Right-click it and choose Host Profiles > Extract Host Profile. Give it a clear name and description so you can recognize it later, then hit OK.
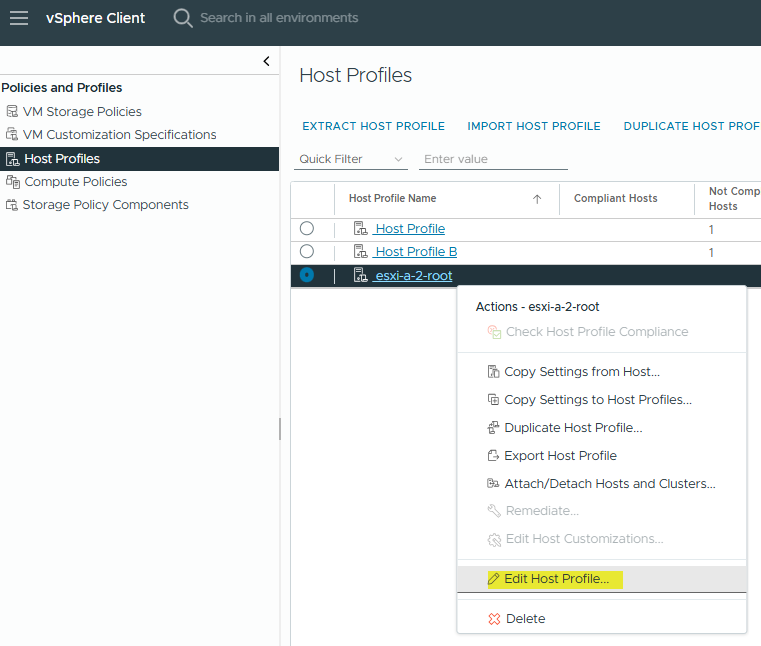
Step 2. Edit the Host Profile
Click the three-line menu icon in the top-left corner, go to Policies and Profiles > Host Profiles, and locate the profile you just created. Right-click it and choose Edit Host Profile... You can rename it if needed, but your main goal here is to reset the password.
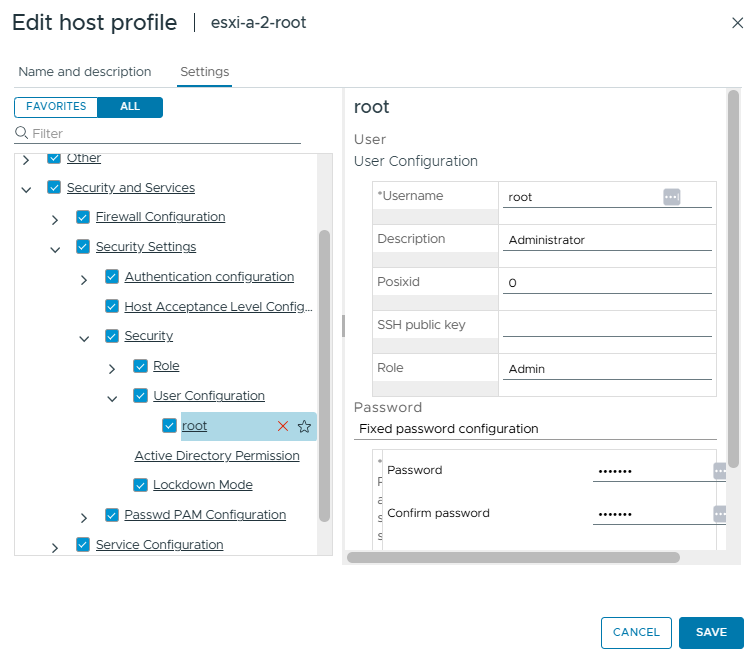
Step 3. Change the Root Password
In the settings tree, navigate to Security and Services > Security Settings > Security > User Configuration > root. In the right-hand pane, select Fixed password configuration, then enter your new root password in both fields. Save and close the editor to apply the changes.
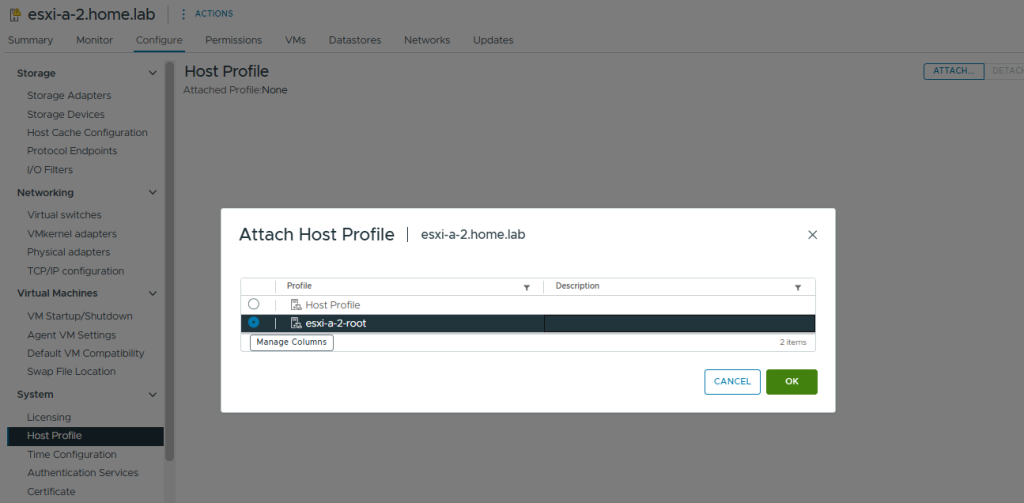
Step 4. Attach the Host to the Profile
Now, right-click the Host Profile and choose Attach/Detach Hosts and Clusters. Pick the host you’re updating, then click Finish to attach the profile.
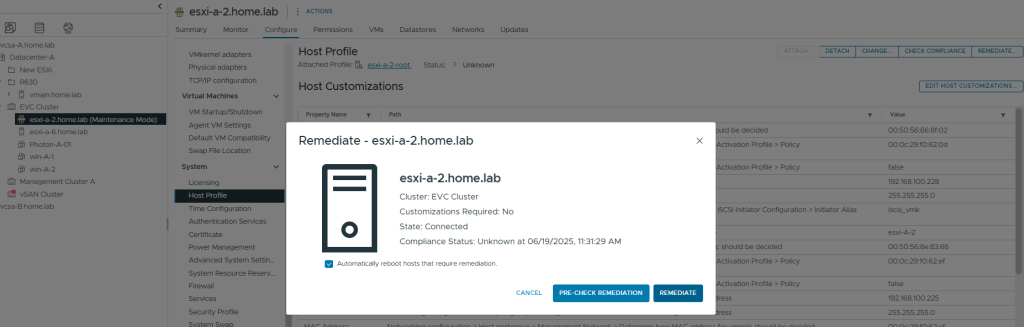
Step 5. Apply the Settings (Remediate)
Before applying the changes, you’ll need to put the host into Maintenance Mode. Right-click the host and select Maintenance Mode > Enter Maintenance Mode, then either migrate or shut down any running VMs.
Then:
Head back to Host Profiles, right-click your profile, and choose Remediate. Then select the host and click Remediate once more to apply the changes.
Step 6. Reboot & Test
After remediation, the host will reboot. Once it’s back online, exit Maintenance Mode and try logging in using the new root password – either through the Web Console or SSH.
That’s It!
You’ve successfully reset your ESXi root password without touching the CLI or reinstalling anything. As long as vCenter is up and running, Host Profiles can be your best friend in sticky situations like this.